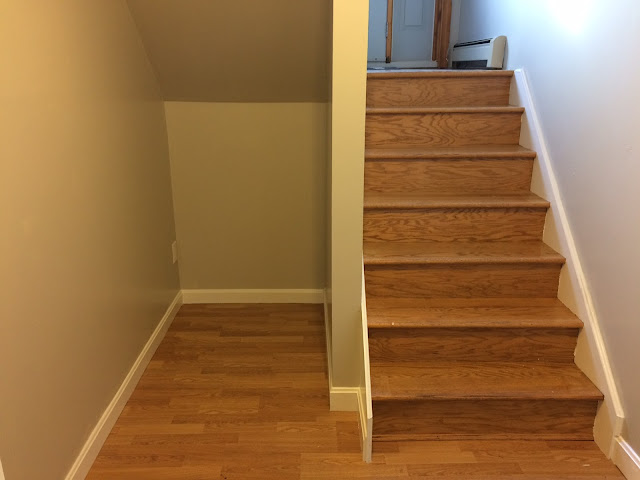
We have four bedrooms in this house. Three of them are currently being used as bedrooms and the other one is being used as a playroom. I hate the idea of having the computer in our bedroom, and don't really love it in the playroom either. The family room was a no-go as well...as was the kitchen, dining, mudroom, etc. Basically the computer could go in this little cubby or.....it would go in one of those rooms mentioned above and I would have hated it.
Here is our little nook under the stairs. Look at it. It's just screaming at me to do a built in of some sort. I found a bunch of idea on pinterest about built in desks, my favorite is found here....
http://www.theyellowcapecod.com/2011/10/31-days-of-building-character-office.html
I followed what her husband did KIND OF... I modified it to be a little simpler, and used different materials.
Here's what I did:
I knew I wanted the desk top to appear floating. I also wanted the computer modem and cords off of the floor, so I knew I needed a shelf underneath. I started those by building the braces. You'll have to measure your own space to know how high/low to place the braces, just make sure you screw the wood into studs. I used 2x3 lumber here.
 |
| (just setting the shelf on top to make sure it fits) |
For the desktop brace I cut two pieces at 45 degree angles on each end and placed them in the corners to add additional support. I'm glad I did this. The desktop was heavy!!
For the desktop I used a Laminate Kitchen Countertop from Lowes. I bought a 4' length, it was around $60. I could have used a wooden desktop, but honestly, I wanted something that I thought would look nicer and would hold up better. I did have to cut the countertop shorter (my width here is about 3') and let me tell you.. THAT WAS STRESSFUL. I don't usually get anxiety when working on a project, but I did have it that time!! If I messed up I would be out $60!! Plus I'd have to buy a new counter. NOT AN OPTION.
After cutting the countertop to size (and making tiny adjustment cuts) I laid the countertop on the brace and screwed it in from underneath. Make sure your screws are short enough that they don't come out the top of the counter. Repeat the process for the shelf underneath.
Here's a nice closeup of the desktop...
After those were screwed in (you could probably do this step before too) I painted the braces the same color as the wall so they would disappear.
I also caulked around the edge of the top so I could hide any gaps from my imperfect cutting.
Guys, seriously, caulk is my best friend these days.
 |
| BEFORE CAULKING |
 |
| AFTER CAULKING |
After that it was finishing touches. I drilled a hole in the back left corner so I could put the computer cords through it.
 |
| The hole for the cords needs to be a little bigger... |
 |
| Here is the bottom shelf.. I want to find someway to organize the cords a little bit better.. but it works for now! |
You can obviously still see that one pesky little cord running over the front of the desk... I need to get a bigger drill bit to make the hole for the computer cords larger. All but one of my cords can fit through it. So when I get around to that, I'll give you an update!


